
There’s just a little bit of magic in falling water, isn’t there? It’s not tangible, but it’s certainly there. How else can you explain the draw of waterfalls? We flock to them, build trails around them and spend hours taking photos.
And as luck would have it, we have a collection of them in Northeast Pennsylvania that I would put against any set of falls anywhere. Specifically, Ricketts Glen is waterfall nirvana. The place is ridiculous, with water spilling in every direction and around every bend. I’ve spent my fair share of time there, usually just hiking and grabbing an occasional shot with my phone, but oddly never taking the time to bring a better camera to really capture one of those cool images in which the water takes on that dreamy look. You’ve seen those photos before, the ones that come close to capturing the magic you get standing at the foot of a wall of water.
So I did that this week and wanted to show you the quick and dirty way to get those photos. There’s no real trick to it and you don’t need a ton of gear to make it happen.
Let’s get to it. Here’s what you need.
- You need a camera that you can control the shutter speed, aperture and ISO.
- A cloudy day.
As far as what you need to know, that list is a little bit longer but not much, and if you follow these steps, you’re going to be knocking out wall-worthy images.
The basics:
- You need to set the ISO as low as possible, likely 100 ISO.
- You’ll want to set the aperture somewhere in the f8 to f11 range, although you can go as much as f22 if you need it to get the exposure correct. (Photo snobs will tell you sharpness suffers when you get out of the middle range for aperture. While true to a point, ignore them. They are being snobs.)
- A slow shutter speed, in the half-second range.
- You MUST, because of the slow shutter speed, keep the camera steady.
Keep in mind this is the quick way to get these photos. To really nail them, a neutral density filter, tripod and remote shutter release are great tools. I’m, however, lazy and not dragging those things on the trail.
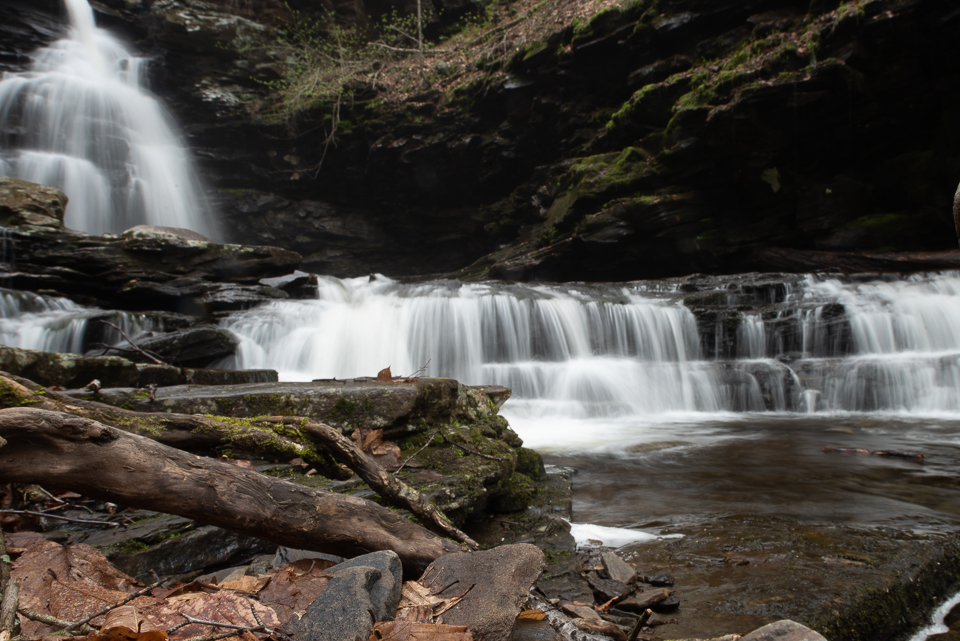
So here’s how I captured these shots. I used a Nikon D750 with a 14-24 mm 2.8 lens. (Yes, this is a big, expensive lens but you DO NOT need one for these photos.) I set my camera at 100 ISO, set the f-stop at f22 (a function of not having a neutral density filter) and used a roughly half-second exposure. I put the camera on the ground and applied downward pressure with my hand to keep it super steady, got my focus and hit the shutter. Boom. Done. Waterfall magic!
I like how the images turned out. So what are the drawbacks of this quick and dirty method?


On a sunny day, I wouldn’t be able to get these images. In that case, you will absolutely need the ND filter. I walked away from a few images I wanted because the sun broke through and there was no way to get the exposure right. A tripod and remote shutter release would be helpful. Keep in mind if your hand is on the camera or touching the shutter, there will be some camera shake, so absolutely perfectly sharp images are out of the question, but I was surprised how crisp these turned out. They are not perfect, but at a casual glance you won’t notice.
That’s it, gang. It’s pretty simple. There’s magic in waterfalls but none in how to take photos of them.
Enjoy, give it a try and feel free to share them with me. I’d love to see the stuff you get. You can see some of my work on Instagram @chaddsebring.

Chad Sebring is the news editor at The Times-Tribune. He has been a journalist for roughly 20 years, having joined The Scranton Times in 1999. He has won several state and national awards for headline writing, design and photography. Chad lives in Clarks Summit with his beautiful daughter, Sophie. Contact: csebring@timesshamrock.com; 570-348-9100 x3486; @chadsebring